
I'm still very new to this, but I want to share what I've learned so far.
When you henna objects, you have the choice of leaving the henna paste on or scraping the henna away and using the henna stain as your art. just like you do on the skin.
When you want to leave the henna in place such as the Unity Candle and the Canvas I hennaed, I've found my traditional Beachcombers Favorite Henna Recipe works well. If the henna will stay on the item, it's important to not have too much cracking and for the henna to adhere well. The sugar in the Beachcombers Favorite Henna Recipe helps with this.
Henna Unity Candle
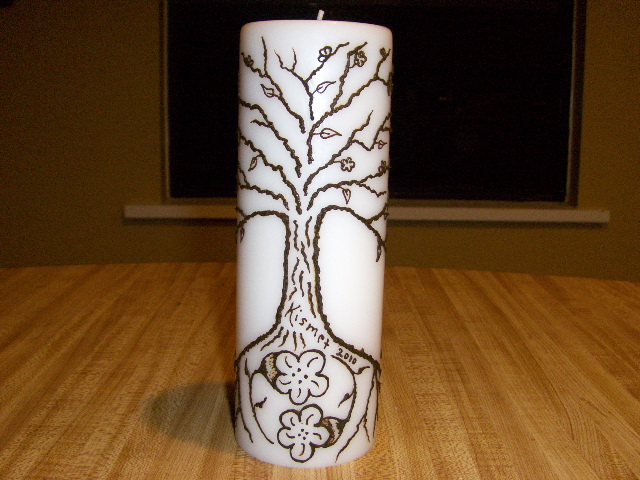

I ended up using a clear acrylic based sealer (don't use lacquer sealers as they can be flammable, even when dry). I sprayed five thin coats after the henna was completely dry, letting the sealer dry in between coats.
I think Modge Podge may work beautifully as well, so I may try that next time.
Henna Canvas Painting

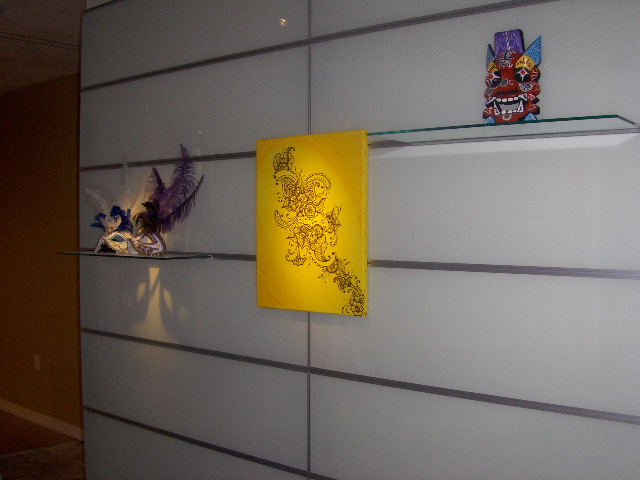
Like the candle, I let the henna dry completely and applied a clear acrylic sealer of the entire canvas in light even coats. As I recall I did about 8 thin layers of sealer because I had to ship it from Orlando to my mom in Ohio. It arrived safe and sound with absolutely no henna having fallen off!
UPDATE! March 2014 (3 years later)
This picture is still hanging on my Mom's wall with all henna attached. There isn't a single piece that has fallen off!
Henna Wood Box


This was a small balsa wood box I got for my Grandmother for Christmas and I hennaed it up! I decided that I was going to remove the henna instead of leaving the paste on the box.
I used my normal Beachcombers Favorite henna mix, but the next time I henna something with the intention of removing the henna, I will mix henna without any sugar in it so that it comes off easier. Applying dry heat helped to remove the henna.
I let the henna paste sit on the box for a bout a week then I removed the henna the day before I saw my Grandmother. The stain was a nice warm brown. The next day, I noticed the henna had already darkened slightly. I expect it will continue to darken over time just like a stain on the skin.
UPDATE! January 2012 (1 year later)
This Christmas, my Grandma had the box sitting out for decoration and the color has deepened to be so dark it's nearly black. It's a very deep walnut brown.
So there it is! My experience with hennaing objects so far! I plan do do a ton of other fun things with henna throughout the year, so I'll post more ideas and tips as I learn. I hope I'll hear from those more experienced than I, so that I can avoid mistakes or "learning opportunities" as I like to call them.
Henna On!
Jody
Very helpful tips! Thank you so much! I am a newbie with henna on candles and boxes. Did you ever try mod podge on henna candles? How do you make sure that the finishing is even without any lines showing up?
ReplyDeleteThanks again!
Thanks for the kind words! Mod Podge works great on candles and other henna objects. You can also use other stuff in henna designs, such as puff paint or whatnot.
DeleteGenerally the product smoothes itself out and doesn't leave a lines. Be sure to not touch it as it dries, as those line tend to not smooth out.
ENJOY!!!
This comment has been removed by a blog administrator.
DeleteA simple wood is always look beauty ,over that henna give more beauty to that wood..
ReplyDeleteI've added some updates about the henna canvas and the henna balsa wood box.
ReplyDeleteGreat blog! Very inspiring
ReplyDeleteQuick question, do you know how to remove the henna from a canvas after it's dried. I do Arabic with henna, but I've made a spelling mistake and it's already dried!
You can remove the paste, but not the stain. It possible to paint over the stain and then re-henna. To cover the stain first you have to use a primer of some sort, then whatever paint you want.
DeleteI hope this helps! I'd love to see pictures of your work. You can post on our Facebook page, https://www.facebook.com/BeachcombersFan.
hi dear, I have done one henna design on canvas with real henna .my base coat is acrylic paints then on top i did henna design with real henna. but i haven't apply any protection coats on top to protect it . you have mentioned regarding clear acrylic sealer . dose it work good ? will it protect henna for years ? cause i want to gift someone .and after acrylic sealer layers do i still need to give mod podge on top layer . please suggest .
ReplyDeletethanks .
sorry for the delay in responding. The picture of the yellow painting with henna (done in 2011) is STILL (2017) hanging on my mom's wall with no flakes having come off, so it's worked pretty darn good!
DeleteI did not do Mod Podge over it. If you do Mod Podge, there is no reason to seal with acrylic first. Good luck!
hi just want to know will the clear acrylic base sealer will protect the henna for years .
ReplyDeleteYes, the clear acrylic sealer has protected the yellow painting from 2011 to 2017 with no problems.
DeleteI used about 8 thin coats of the spray acrylic on the painting with no additional sealer.
I hope this helps!