Quick Shopping Links

Monday, March 17, 2014

How to Practice Henna Technique

How to practice henna to get results! Get ideas to up your henna game and expand your henna vocabulary.

Practice! Practice! Practice!

Everyone needs practice, even professionals. Professional athletes don’t just play on game days. They practice every day: so do musicians and singers. Practice is what gets you into the big leagues, but you need to continue to practice to stay there.

Ok, so you already know that you need to practice, but exactly HOW do you practice henna to get results?

What do you practice on?
You don't always need skin to practice. In fact, practicing isn't always pretty! You can do some of your practice on plastic sheet protectors so you can wipe away the henna and keep on practicing and do some of your practice directly on paper so you have a record of your improvement.

What do you practice with?
It’s best to practice with actual henna, but you don’t always need to use henna for practice. You can use marker or pens in addition to henna. I’d suggest that at least half of your practice be done with actual henna paste.

· Markers/Pens
If you are working on plastic sheet protectors use a dry erase marker. If you are working on paper, use a felt tip pen, sharpie, or any other writing device. Using a marker will help you build muscle memory and give you the feel of design placement, but you won’t be able to practice the pressure and flow of the actual henna paste.

· Henna Paste
At least some of your practice should be with actual henna. The pressure, flow, and texture can’t be duplicated with anything else. I use the old leftover henna for practice. Never throw away henna! If you make it wrong, ruin it by letting it sit in a hot car, or whatever, you can always use it for practice.

* Money Saving Tip! If you are mixing special henna for practice, mix the henna without essential oils. Let’s do the math on this. One hundred grams of henna will yield about 25 regular size cones and costs less than $10. You can do a TON of henna practice with 100 grams of henna! If you are eventually doing henna on others, nearly every henna design you do will be $10 or more so your first design pays for the practice henna.


Onto the actual henna practice...

Create Muscle Memory
Create muscle memory by tracing a design. Once you’ve traced a design, free hand that same design over and over until you get it just right. In the middle of free handing a design, go back and trace the original again to be sure you are getting it correct. Do an entire page if you need to, but do it until you feel comfortable.

Repetition
Practice should be done on a regular basis. It doesn’t have to be every day, but once a month isn’t going to yield many benefits. Find a practice schedule that works for you. Consider adding a rest day in-between practice sessions. This gives your brain some time to let the practice sink in.

Instead of trying to practice everything at once, practice a few things a day. Doing 2 designs 25 times each is better than doing 25 designs 2 times each. 

Henna Bumps: Basic Element Practice

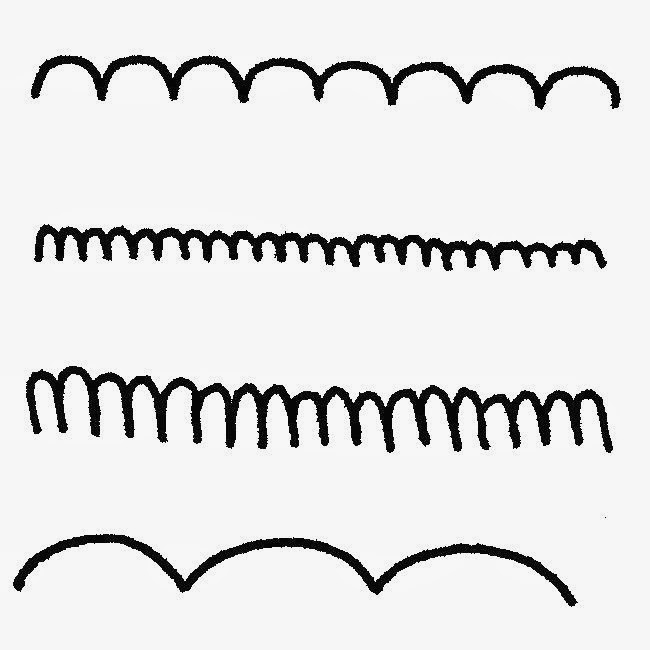
Henna bumps: Basic Henna Elements Practice
Henna Basic Elements
This is the most important part of practicing henna! The basic henna elements should be the bulk of your practice. Practicing the basics allows you to focus on the overall design of your work. The basics should be able to be done in your sleep.

First, trace the element. Do this a couple of times if you need it. When you are ready, start free-handing the element over and over. Do rows and rows and rows of a single element.

Do at least 7-10 rows of the same element during your practice sessions until you feel you have that element cemented in your henna vocabulary.

Once you have a specific element down, drop your practice to 2-4 rows of that element and move on to another henna basic element.

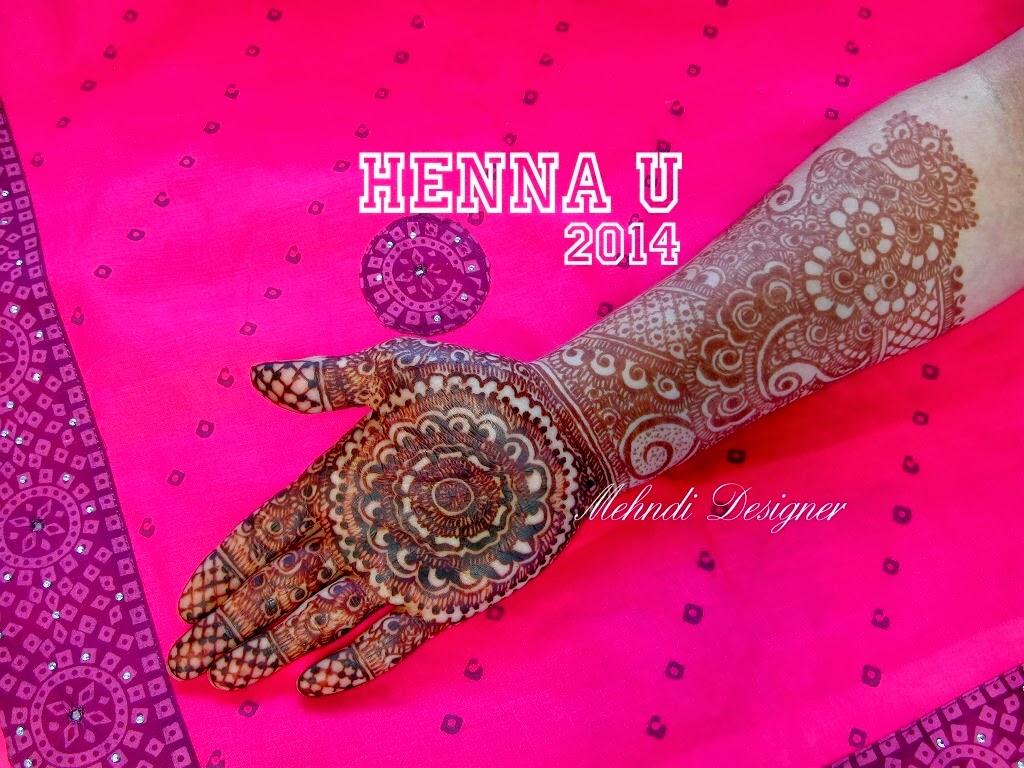
If you are not familiar with the basic henna elements check out the Basics & Beyond eBook.

Draping Lines
Practice draping long straight henna lines until it become natural. Keep in mind, on paper, you will be draping lines as long as you can, up to 8 inches. On a hand or foot, the most you’ll need to drape a line is 2.5-3 inches, generally. Practicing with these long lines forces you to learn control.

Do half a page of full rows of draped henna lines. For the other half of the page, do smaller 2-3 inch lines.  Focus on pressure and speed in different combinations. Drape lines right next to each other to create thicker lines.

Practice drawing (rather than draping) straight lines too. You can’t drape a line on a vertical surface such as an upper arm or back piece, so you’ll need to be able to create straight lines by actual drawing lines in henna.

Combining Elements to Create Common Design Motifs
Combining Elements
Pick 2 or 3 basic elements and practice combining them. Do an entire page of these designs with each row being a different combination of the same few basic elements.

Small Common Henna Design Motifs
There are a number of very common designs that are used in henna in different combinations.  Practice these common motifs over and over until they are deeply embedded in your henna vocabulary. These don’t have to be common to henna, but they should be common to you and the henna style you prefer.
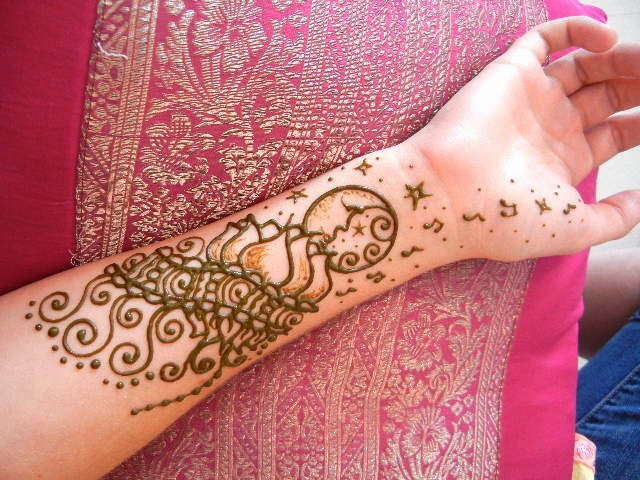
Full Henna Designs
As you improve, practice full blown henna designs. My favorite way to do this is to use our hand template and do mirror images. This forces you to work against your natural left/right bias and helps you develop and eye for symmetry.

The idea is to incorporate henna practice into your routine so that you can grow and improve as a henna artist.

Happy hennaing!
Jody


Thursday, March 13, 2014

Henna U 2014: Bridal Bootcamp Follow-Up


WOW!  What a fantastic henna conference! Henna University 2014: Bridal Boot Camp was a raging success full of amazing people and great times. I can't say enough great things about Neeta Sharma, Mehndi Designer.

As a teacher, a henna artist, and a person, she is positively spectacular! Neeta, one of the premier bridal artists in the world, taught 5 intense hands-on classes. With a focus on using a few basic shapes per henna design, she made complicated bridal mehndi approachable for anyone. Even new artists shared with me how much more comfortable they were with creating cohesive henna designs.

Having just returned from India, where Neeta studied Gulf-style henna, she shared the current trends in Indo-Arabic bridal. We even examined bridal trends for the past 10 years and discussed what we liked and why.
Being the host of Henna U, I was lucky enough to get an arm full of bridal henna from Neeta in a an Indo-Gulf (Mumbai) style fusion. Others at the conference received lovely sangeet-style henna pieces by Neeta.

We were also treated to a class about adding bling to henna designs by Ena Rodriguez of The Henna Studio, here in Orlando. In addition to learning some history about body art, we actually mixed our own gilding paste during this class. Ena had a nice selection of glitters, powders, and gems for us to decorate our henna!

Our very own Asad, of Beachcombers, taught an accounting basics class. Contrary to the subject matter, this was one of the classes with the most laughter and fun!

Add to that...the students! What an incredible group of women! I suppose Mary and Courtney in any room is a good thing, but we really had an amazing group. We had professional artists and people that were picking up a henna cone for the very first time. Facebook IDs and phone numbers were exchanged and I think I'll be seeing many of the same faces next year, just as an excuse to hang out again!

We'll be hard pressed to top Henna University 2014, next year. I'll be keeping my eyes open for a teacher that is up the the high standards that Neeta has set. As always, the theme of Henna U 2015 will depend on the guest teacher we secure.


It's a whole year away, but  while you wait, we'll continue to have Henna U extension classes and labs to learn different henna techniques. I'll also be releasing a new henna design eBook by Neeta Sharma soon!

Learn more about henna at the free Henna Learning Center.


Henna On!
Jody

Tuesday, March 11, 2014

New Henna Artists Guild of Orlando Meeting!

Woop, we have a member of our extended family (meaning online henna community member) coming to Orlando from New York, Dharti Patel. I thought this was a wonderful excuse to organize a Guild meeting!

Sorry it's so last minute, but she'll only be in town for a few days. Let's sling some henna while we can!

Open to local henna artists and students of Beachcombers' Henna Workshops.
 
We welcome aspiring henna artists of all levels! 
This isn't an exclusive club, it's a community of henna-loving artists that want to share. Join us!

I am hosting this meeting during prime dinner hours, so I'll have pizza for us, but feel free to bring your own drinks or nosh!

Club Meeting Info:

    Date:  Tuesday, March 18, 2014
    Time:  5:30 - 8:00ish
    Location:  Beachcombers Offices & Henna Studio
    8503 Forest City Rd, Orlando FL 32810
  

Sorry, no children at the meeting.  No exceptions.
Bring your business cards if you have them, and henna paste if you'd like to participate in hennaing our naked hands.


Wednesday, March 5, 2014

Product Spotlight: Tree Stand Bracelet Holder

The Tree Stand Bracelet Holder is a fun way to organize your beautiful bangle collection, while perfectly complimenting your home.
wood tree stand bangle display holder

With nine arms made from hand-polished wood, this bangles display stand holds around 340 individual glass bangles, depending on size. The arms angle slightly upward to prevent bracelets from sliding off. Because the item is handcrafted, the finish and grain of the wood vary with each individual stand, making them unique pieces with premium visual appeal. The elegant spiral design helps display bracelets in an organized, attractive and even artful manner.

In addition to bracelets or bangles, the tree stand can be used both to display and organize a variety of other items as well, including watches, necklaces and chains, hair ties and scrunchies, sports bands, and more. It can even be used to display decorative napkin rings in the kitchen or dining room. The holder is a very versatile item and can be used either at home or for high-end commercial displays of merchandise. At home, the tree stand bangle bracelet holder fits in perfectly with numerous decor styles.

The holder is 15.25" high and 9.5" wide, making it the ideal size for table or counter top display. The stand is large enough to hold hundreds of bracelets or many other items and yet petite enough not to dominate a dresser or counter area. It also includes a wide and sturdy base that will prevent it from tipping over and help to keep things organized and secure.

The holder is quite simple to assemble. From start to finish, setting up this elegant display only takes minutes.

Monday, March 3, 2014

5 DIY Ways to Recycle and Reuse Glass Bangles

Indian glass bangles are beautiful, vibrant and effortless additions to any wardrobe. They can dress up an event, or go with you to the beach. Eventually, these bangles may break from your "tough love" of wearing them everywhere, but that doesn't mean you have to throw them away. Give them new life! We've come up with five simple and elegant DIY projects to help you recycle and reuse your old, broken glass bangles.
broken bangles by the pound for crafts
  1. Candle Holders - Stacks of broken bangles make a pretty candle holder. You can stack them loose around a candle, bind with hot glue or go the extra mile and use thin craft wire from a hobby store to bind individual bangles together for a sturdier stack. The 30-36 gauge wire works best. Space 3-4 wires equally around the bangles and wrap the wire once or twice around each bangle, working your way up the stack. Light the candle and admire the beauty! 
  2. Curtain Rings - Bangles that have broken open slightly but not lost too much material can be recycled into curtain rings. Slide the open end of the bangles into the slits in a curtain. Use two or three bangles per slit, or more if the curtain is heavy and you can fit enough bangles. Slide this onto a curtain rod and step back to appreciate your handiwork. You could even use broken large bangles to bunch curtains in the middle for fashionable tie-backs. 
  3. Hanging Mobiles - Use fishing line or cord knotted around the glass bangles to create a great mobile. Using one bangle at the top, tie cords around it at different heights, and tie various other bangles onto the other ends. Hang it in the window or out on the porch. 
  4. Wall Display - If you've got some blank wall space and a heap of broken bangles, put them together for a unique wall hanging. Use craft wire to bind broken bangles together into interesting shapes. Overlap them, or set them flat, side by side. Whatever you create is sure to spice up your living space! 
  5. Mosaics - If you want a project to really take some time with, try using your broken bangles in a mosaic. You can find a kit and supplies to create mosaics at any hobby store. Indian glass bangles make a special addition and really personalize a kit project for you. You can break the bangles (carefully, inside a rag!) into small pieces and place the decorative top side face up. Use broken plates or any other ceramic and glass items the same way. 
Of course, once you've cleared out your stash of broken Indian glass bangles, there's room for some new ones in your jewelry collection! Try out new colors and styles, or grab a set of your old favorites. And, if you've gotten addicted to DIY crafts using bangles but ran out of broken ones, you can find broken bangles by the pound right here. Take these ideas and run with them! How many more ideas can you come up with?